Wednesday, December 26, 2012

Got Scraps?

My scrap storage situation has been bugging me for a long time. Every time I want to make a something with scraps they are all over the place. I used to just drop them all into this very large hamper.


Except this little guy thought it was a cool place to hang out and despite the lid, he would slip in there anyway! So between cat hair and the bottomless pit it seemed to be, I pulled them all out and dumped them on our dining room table and sorted them like so by color


While this was much, much neater, it also put them into my fabric closet out of sight, which to me usually means out of mind. And maybe too organized for scraps! So when I needed something from the bottom bin there was lots of shuffling and sitting on the closet floor. I needed something, just wasn't sure what... I have a bar height table that I use for my cutting table, and store big bins underneath with projects and yet another scrap bin of recently used fabric scraps meant to be filed into those bins above. 


So then I had an idea. At Ikea they *used* to sell a table, I think it was a kitchen island, with lots of drawers. So I thought I could replace my cutting table with that island, and that would solve the problem. Except they don't sell it anymore....Back to the drawing board. Then I came up with this


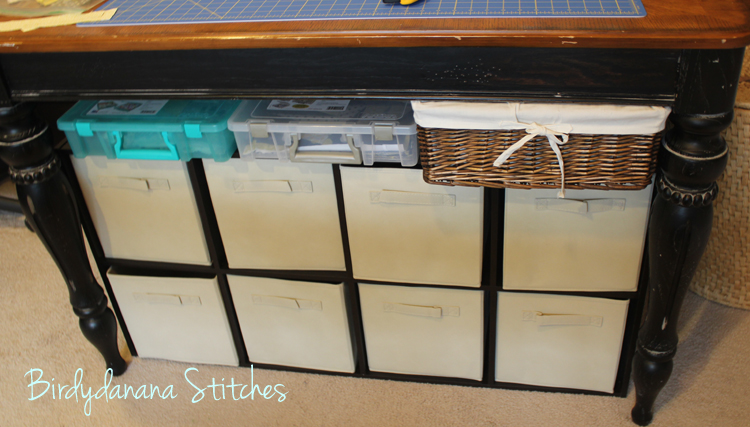
A ClosetMaid Cubical system! Bought at Target for like $50. Then decided to get the matching bins for $12.99 for a 2-pack. Problem solved, and the color matches my table and there's even room on top for my selvedge bin and a couple of project bins. And there's still room behind it for my fabric dyeing supplies and that tub of recent scraps. Since I now had all that room in my fabric closet, I got another Cubical and put it in there to keep that a little more organized, too, of course I forgot to take a photo before writing this post, but you get the idea ;)


Thanks for stopping by!

Tuesday, December 18, 2012

Giant Star!

Just finished whirlwind quilting on this one, another one of my sisters quilts (she can sew them faster than I can quilt them!). This ginormous quilt is a Christmas gift for my Niece and her hubby so it needed to get done crazy fast. So I received the quilt last week, and of course needed to order thread to match, but was able to get it done in a couple of days and it is now on its way back to her to finish up the binding. I did some jelly feathers (a'la Lisa H. Calle), some swirl feathers (a'la Green Fairy) -which I don't feel like I'm great at, but they came out ok and they blend into that reddish border so they're kinda hidden! And just some back and forth quilting in the borders. I attached the binding to the front while it was still on the longarm (my favorite way to get the binding on now!) and so all she has to do is stitch it to the back. She's hoping to be done so they can take it home with them after their visit for the holidays.


Thanks for stopping by!

Monday, December 17, 2012

A finish!

Well I finished up my sister's green quilt, that one was so much fun to pick a different design for each curvy row and stitch it out. I finished up in the dark so folded it up overnight to wait and take pictures the next day (and of course it creased!) flat on my sewing table to hopefully catch some of the texture from all the quilting. And of course, as I am prone to do these days, I was channeling Angela Walters the whole time I was stitching away! 


Thanks for stopping by!

Wednesday, December 5, 2012

Next up...

SO in between all the craziness around here I have managed to load up a quilt onto the long arm. 

Next up on the longarm is a quilt made by my sister. I made this same quilt a few years ago, and she wanted to remake it, so she took my pattern home and got to work. She added a lot more yellow/orangey yellow than I did and I really like it with more color, mine was very green. It looks very wrinkled in the picture, but it really wasn't that bad in person!


So my plan with this one was to just have fun! I thought in between the curvy blocks I would do some wavy lines with pebbles in a few of them in, then in each of the wavy sections I would quilt a different filler design.

So far so good I think! I've got about half of the quilt done so far and hopefully will finish up in a day or two. Sorry for the bad iphone picture...


Another post coming soon, much sooner than it took me to do this one! Gotta get into the hang of this bloggy stuff! 


Thanks for stopping by!

Wednesday, November 14, 2012

My Wonky Stars

This quilt was months in the making! I sent red and aqua fabric scraps along with Kona white for the background off to 11 Bees from the Moody Blues 2 Bee and asked them to make wonky stars. Any kind of wonky stars they wanted in any size and more than one if they wished. Let me tell you those girls got creative! I loved each and every star I got back and only had to make a few more to get enough to make the quilt. Here are all the blocks I received: 
Wonky Star Blocks


I laid out all the blocks on my design wall in a layout I liked. Then moved them into loose rows so that I could add more Kona white to each in order to make larger blocks and then make those blocks into rows.

Here are all the blocks put all together and ready to quilt

When I was putting the quilt together I knew exactly how I wanted to quilt the white areas. The stars, well, not so much! I wanted to do swirls with flowing tails so the stars would look like they were floating across the quilt.
Here it is all quilted up

And all finished with binding


Thanks for stopping by!

Monday, November 12, 2012

Mom's quilt

So here it is! I finally started a Blog.... haha! It was only a matter of time!

So my first post will be about the quilt I just quilted for my mom. She sent it to me a little while back and I finally got it on the machine and started quilting it in between regular sewing, training for a 1/2 marathon, and everything else.

So about the quilt, she said it was called Trip Around the World and she used a bunch of pretty batiks. She did a great job in picking out the colors and the sewing of all these squares! I quilted it in an allover, freehand "Hooked Feathers" in Signature Cotton Thread Baguette. I chalked all my spines on each pass then quilted the spine and then the feathers down one side and then on the other. It was fun to do, although time consuming and a bit nerve wracking because I'd never done a quilt that big with those feathers. I think it came out great! She does, too! She received it back the other day and loves it!
All done!


One corner


Part of the back


Thanks for stopping by!